Showing posts with label Mending. Show all posts

Thursday, March 7

Re-soling my Saltwater sandals

NOTE; I've decided to start putting links in a list at the bottom of my posts, rather than inserting them in the text.

Ever since the demise of my extremely comfortable Teva sandals (I could walk miles in them) after about 14 years wear, I have looked for something similar to replace them.The newer Teva versions are nothing like as good, and neither are any other "walking" sandals that I've seen. In 2016 I discovered Saltwater sandals and sent off for some; I guessed they wouldn't be quite the Teva equivalent I was looking for, but I very much liked the design. They come in lots of colours, including an olive green that I would love to have.


These are mine, pictured on the cobbler's last that belonged to my grandfather, who died before
I was born -


They are a perfect fit, and very comfortable, and I can cycle in them. However - here are some facts about my right foot, which I'm sure you are very interested in. A few years ago I realized that I was having problems with slight numbness in the toes of said foot, and after a lot of reading up I realized that I had what is called a Morton's toe (on both of my feet actually, but the left foot isn't negatively affected by it) which is where your second toe is longer than your big toe, due to the metatarsal bones in your big toe being shorter than they should be. This was causing the numbness. I knew instinctively that I needed to be able to feel the ground more as I was walking. I then came across "Born to Run" by Christopher McDougall, a fascinating book to read if you are interested in how we naturally walk, but don't, when we wear (most) shoes. Look at a baby's foot, at how the toes are splayed out, and look at an adult's foot........!!!!!!! It's shoes that are responsible for that change. Many people, when they are diagnosed with some sort of foot problem will be recommended to use orthotics; however this is often exactly what they don't need. What they actually need is to get back to a more natural way of walking, and a change of footwear may well be the answer rather than orthotics.

I have since struggled to get shoes that fit the natural shape of my foot, especially winter ones, and that have thin enough soles to really feel the ground beneath them. The soles on the Saltwater sandals are indeed thin, and are fine on short distances, but I have found they are not so good when walking further, or on hard surfaces. To be honest I suspect it may be the type of sole material used as much as the thickness, but I thought I'd try adding some extra material to the soles to see if this made the difference I was looking for.

So, could I, and should I, Do It Myself?

I thought of looking for a pair of shoes or sandals in a charity shop, cutting off the soles and sticking them on my sandals, as I already had some suitable shoe making/mending glue from a previous (unsuccessful...) project, but I didn't see any. Next step - I thought I might as well find out what the local cobbler would charge, so took the sandals in and asked.

£30!!!! Gulp!!

Apparently it was "the work involved" that made the charge so high. Well, to be fair to all craftsmen and women, I know that people don't always realise what or how much work is involved in a job, but there was no way I was going to spend that amount.

Instead I went home and ordered some stick on soles instead. I actually bought 2 pairs of very large Vibram men's soles - just the top halves, and each pair came with a tube of glue. My intention was to cut two top halves and two bottom halves.


One of the half soles, with glue

First I sandpapered the soles of the sandals, as instructed, to roughen them up. I should also have done the same to the new soles, but I forgot.....but they weren't all that smooth anyway so I thought they'd probably still stick. I then cleaned the sandals' soles with meths.


I put the sandals on top of the sole, and drew round them -


Cutting the material was actually quite difficult. I used a Stanley knife and went very slowly so that the knife wouldn't slip, and then I proceeded to spread glue over the whole of each sandal sole. (I have to admit the glue stinks, and you really do need the window open. This is much more stinky than the other stuff I have.) However, I realized pretty soon that the stuff begins to dry out rapidly and and you need to just put glue on a SMALL area, spread it, and then do another bit. Otherwise you could end up with the whole sole covered in glue but not being able to spread it as most of it would have already half dried.

I then left the soles to almost completely dry for the requisite amount of time, about 15 minutes, and then stuck the soles on. Meanwhile I realized I'd made another mistake by not drawing round the bottom halves of the sandals when I cut out the top halves i.e. before I spread the glue all over the soles...... But I managed to do it all right at this stage anyway without the uncut bottom halves sticking to the sandal. That may not be very clear......but basically the lesson I learned was that you have to think carefully, before you start, about the order you're doing things in!!


Here is the completed job -


As you can see I didn't get the new sole fitted to the sandal on the right quite perfectly - that was mainly due to it being hard to cut exactly on the line I'd drawn. And maybe my inaccurate drawing in the first place....

I've now got about an extra 3 mm.


I'm really pleased with how well the job turned out, although I won't know whether it's made the difference I'm hoping for until I wear them again, which won't be just yet....and the total cost was £11.97, a lot less than the £30 I'd have had to pay the cobbler!

Incidentally, I think that my grandfather would have been using this cobbler's last in the days when everybody had to make do and mend. My dad wrote some notes on life when he was very young in the 1920s, and I think that probably shoe repairing would have been something his parents, and others like them, had to do themselves, along with any other mending - hence having the cobbler's last.

Anyway, that's me "soled" on doing my own shoe repairs.....next pair to do will be my beloved Dr Marten's (the style I have has a more natural foot shape than many shoes, and soles that aren't too thick, although still not completely natural) which have a hole in the leather and a split in the sole. I bought some new ones to replace them but I'm not giving up on the old ones yet.

LINKS

Saltwater sandals

Very interesting Guardian article on Saltwater sandals

Born to Run


Saturday, November 28

This Month I have been Mostly doing.... Mending, and a bit of altering

This is actually rather a long post. If you like reading about mending read on, if not, better go and do something else.....


First there were the cardigans, which was the altering bit. I bought two, the same style, one pink and one blue, in a charity shop for £1 each. This was the blue one -


Both cardigans are in very good condition. I'm definitely a wool person and if I was buying new (or knitting it myself) I'd want more wool than this, preferably 100%, but for £1...... Enough to keep me warm - ish. I would guess that it is probably 80s or 90s, judging from the label. It's certainly a long time since I saw a Littlewoods shop.

The problem with them was that the neckline was quite high, and when I wore them the top edge made my neck itch. How to remedy this? First I got a strip of old t-shirt and used it to line the inside of the ribbed section, but unfortunately I could still feel it scratching me right on the top edge. I thought about doing it again and making the jersey go slightly over the top, but I thought that might look daft. Dare I do some chopping? Well, if I wanted to wear these cardigans then that was the only answer. So I cut off the top ribbed bit, but before I did that I sewed all round, through the stitches, just below where I intended to cut, to stop (hopefully) the stitches running.


Then I did blanket stitch all round, and Bob's your uncle, one warm wearable cardigan for the winter!


(I just put that old cotton reel in for interest. It's an old make I've never heard of. I've got quite a lot of old reels of cotton - some I use for tacking and some I dare to use in the machine, despite some people saying that you shouldn't use old thread in your sewing machine.) Anyway, this is the finished cardigan. The neckline is a bit wavy but I don't think that matters.

And this is the pink one. (Husband loves this colour on me but hates the blue one!) When I was little I would never have worn pink, thinking it was too girly girly, but when I got to about 20 I decided I liked certain shades of pink and that they suited me, and now it's one of my favourite colours. 


Now on to a bit of mending for a customer. This particular one is quite a regular - I have done a lot of mending for her. The sort of person that one might describe as "well to do".  What I like about a lot of such people is that they appreciate good clothes and household linen and get it mended when it needs it. I darned her husband's wool cardigan, which I think she said he "wears round the house now". 

Here's the major hole before darning. Incidentally I use embroidery thread where a fine thread is called for, because I don't know whether VERY fine mending wool exists, e.g. suitable for merino wool garments. I have not found any. One of my other customers has a box choc a block full of really good quality mending wool, which she gives me to use for her mending, and none of it is fine enough to use for this sort of garment.


And after mending.


Another of the many holes....(It really is the same cardigan! I don't know why the colour is not accurate here) -


And after


And now on to trousers for the same lady's husband. These were a pair of chinos with some minor wear and tear type of holes. I use woven cotton iron-on interfacing for this sort of repair - I iron it onto the back of the hole/rip and then stitch over it on the right side, in this case just using a straight stitch.


Again the colour's not very accurate -


And now, my piece de resistance...... (apologies here to any French readers for the lack of accents. It might be very offensive, just as missing apostrophes are to moi! And Liz Truss. And John Humphries. I know there should be two in there but I have yet to learn how to put them in on the computer. I have the same problem with umlauts when using German words occasionally to my son in Germany) -

MY FAVOURITE JEANS

These jeans are at least 5 years old. This first photo shows some mends I did, ooh, maybe a couple of years ago. Recently I had begun to get worried that the jeans were getting so thin in places that if I wasn't careful I would be walking around one day unintentionally revealing what was underneath.....and given that some of the most worn bits were around the backside, well, that doesn't bare thinking about. I decided that they had had it, and were only fit for cutting up and making into something else, but then I thought about how much I liked these jeans, and surely if I did quite a LOT more patching and stitching.......

By the way I like the idea that a garment isn't finished when it's finished, if you get my meaning, but that it continues in its development after this, when someone mends it, or alters it. I think I read that on Tom of Holland's blog (if you want to see some amazing mending, go there). So I am continuing the development of my jeans, as it were.


Detail of one of those original mends.


Another detail


 This is what my jeans look like now - and I'd just like to add that the other day, in a shop, the assistant was very complimentary about them and when I said I had just finished mending them, she said she thought I'd bought them like it!

Again I used embroidery threads, usually two strands. Fortunately I have a big stash of them, some bought and some acquired from I can't remember where!


This pic shows the inside after I had ironed on lots of the aforementioned interfacing over the thin bits. My intention at this stage was to do lots of stitching over the worn bits. 


Here I have done some stitching, on top of the denim, and below on the dark blue patch, which I had machined on. This patched bit is along the lines of Japanese boro mending - if you haven't come across this type of mending then have a google. I love the look of it, especially with all the indigo fabrics they use. Oh, another thing to mention is that I undid the inside leg seams to make all this mending much easier.


In the pic below, you can see hand stitching (red, yellow etc.), under the patches. And a non-patched stitched pink rectangle. I have to admit that I had to give up on the idea of close hand stitching (for strength) all over every thin bit - it was taking ages and much as I loved doing it I wanted  to be able to wear these jeans in the not TOO distant future. So I added the patches (bits of old shirt), and then did hand stitching on top - with the patches strengthening the fabric the stitching didn't need to be quite so close together. 


Detail of pink bit.


And here is the back of the jeans. The two patches to the left I hemmed first, but the one on the right I didn't - it's got raw edges. In images on the web the boro seems to have raw edges (I would love to see some in real life). I do like raw edges and wish I'd done all the patches like this but I only thought of it halfway through. Of course it may be that the raw edges will fray too much when washed but we'll see.


And finally, blanket and running stitch round the pocket, and random darning behind it.


I really have been on a roll with the mending lately, so much so that when I finished the jeans I was looking round for something else to mend, and here it was - oven gloves! I should say that these are actually CLEAN - fresh off the washing line in fact, just stained. I do have a talent for getting stains out of things (another post perhaps!) but really I don't think stains on oven gloves matter. 

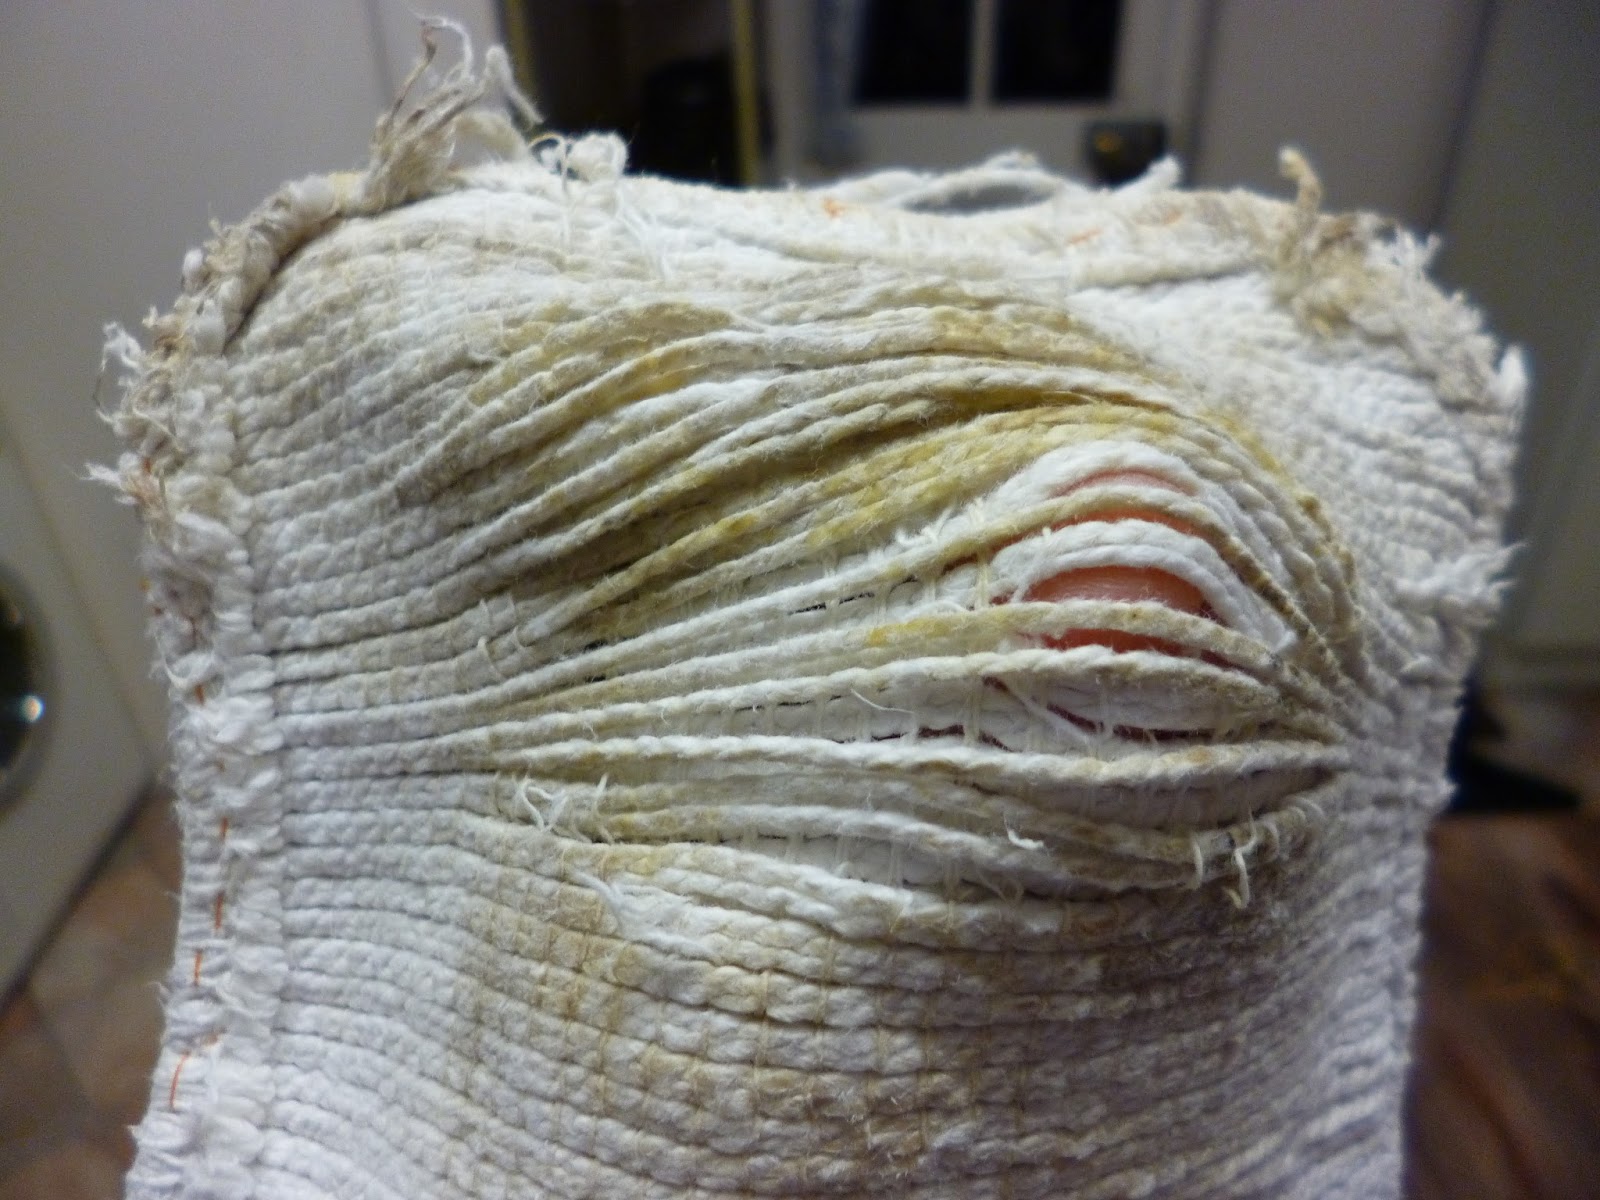
I had already mended these 4 years ago (yes 4!), using another pair - hence the hand stitching round the edge. I was going to patch them but then as I was standing at the kitchen table waiting for something to cook (it was tea time) I looked at a cone of very thick cotton thread that happened to be there amongst my sewing stuff (I do have a sewing room but I tend to do a lot in the kitchen too) and thought "Ah! some weaving perhaps!"


You can see that one might burn one's fingers......


So, weave away I did.


Both ends done.


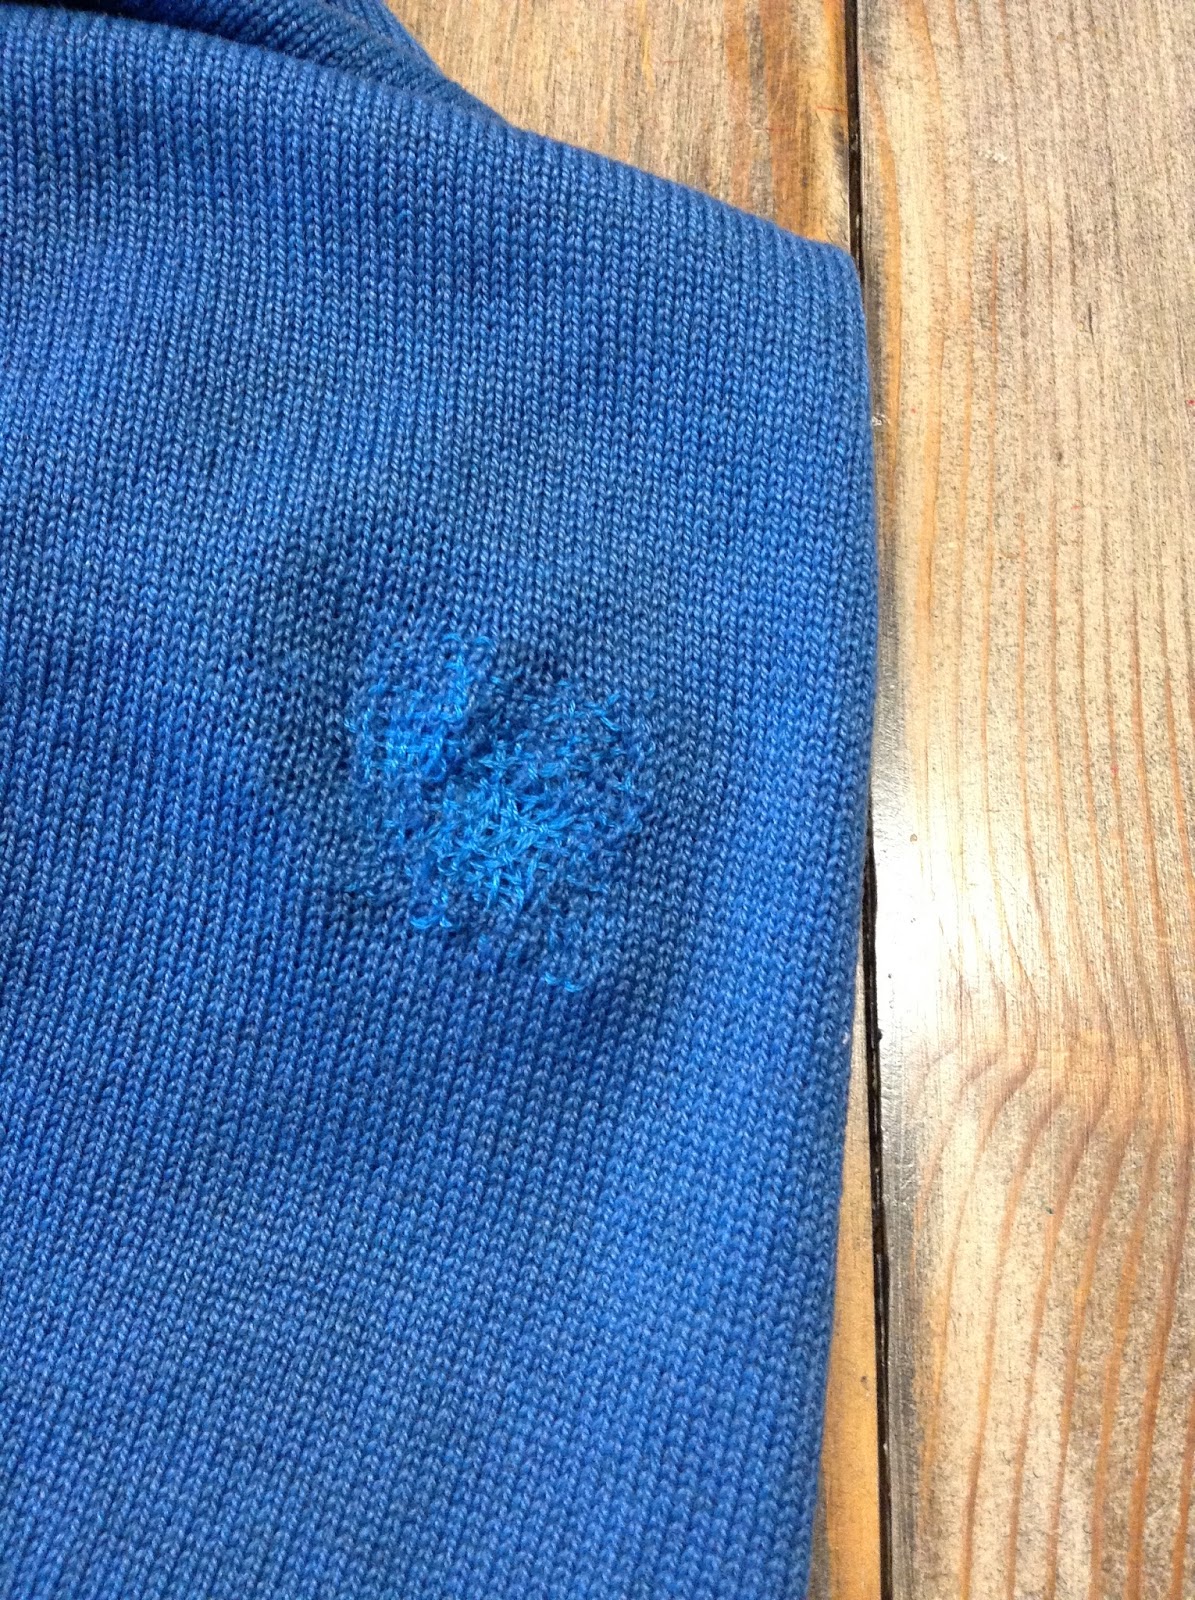
One last pic. This is my husband's favourite jumper, which I bought him in a charity shop. It has at least 6 darns - this is the latest one. This is very visible mending; fortunately he doesn't mind. In fact I think he's quite proud of my darning......


Is that an ending to my mending? Well, just for a while.Our own mending alone (apart from what I do for other people) is never ending really, but I don't mind, because I really enjoy both the doing of it, and the satisfaction that comes of making something usable or wearable again.

And so to bed, but first a question - have you mended anything lately?? Or got something tucked away waiting to be mended??!!

Lizzie