In my previous post I wrote about the Carradice panniers that I wasn't happy with, and how I improved them. However, before that, I had seen a post on a Facebook group I'm in, where somebody had made some panniers, and I thought - I could do that..... Hers were roll up ones, which would have been my preferred style, but I didn't have enough fabric for that. Next time maybe.....
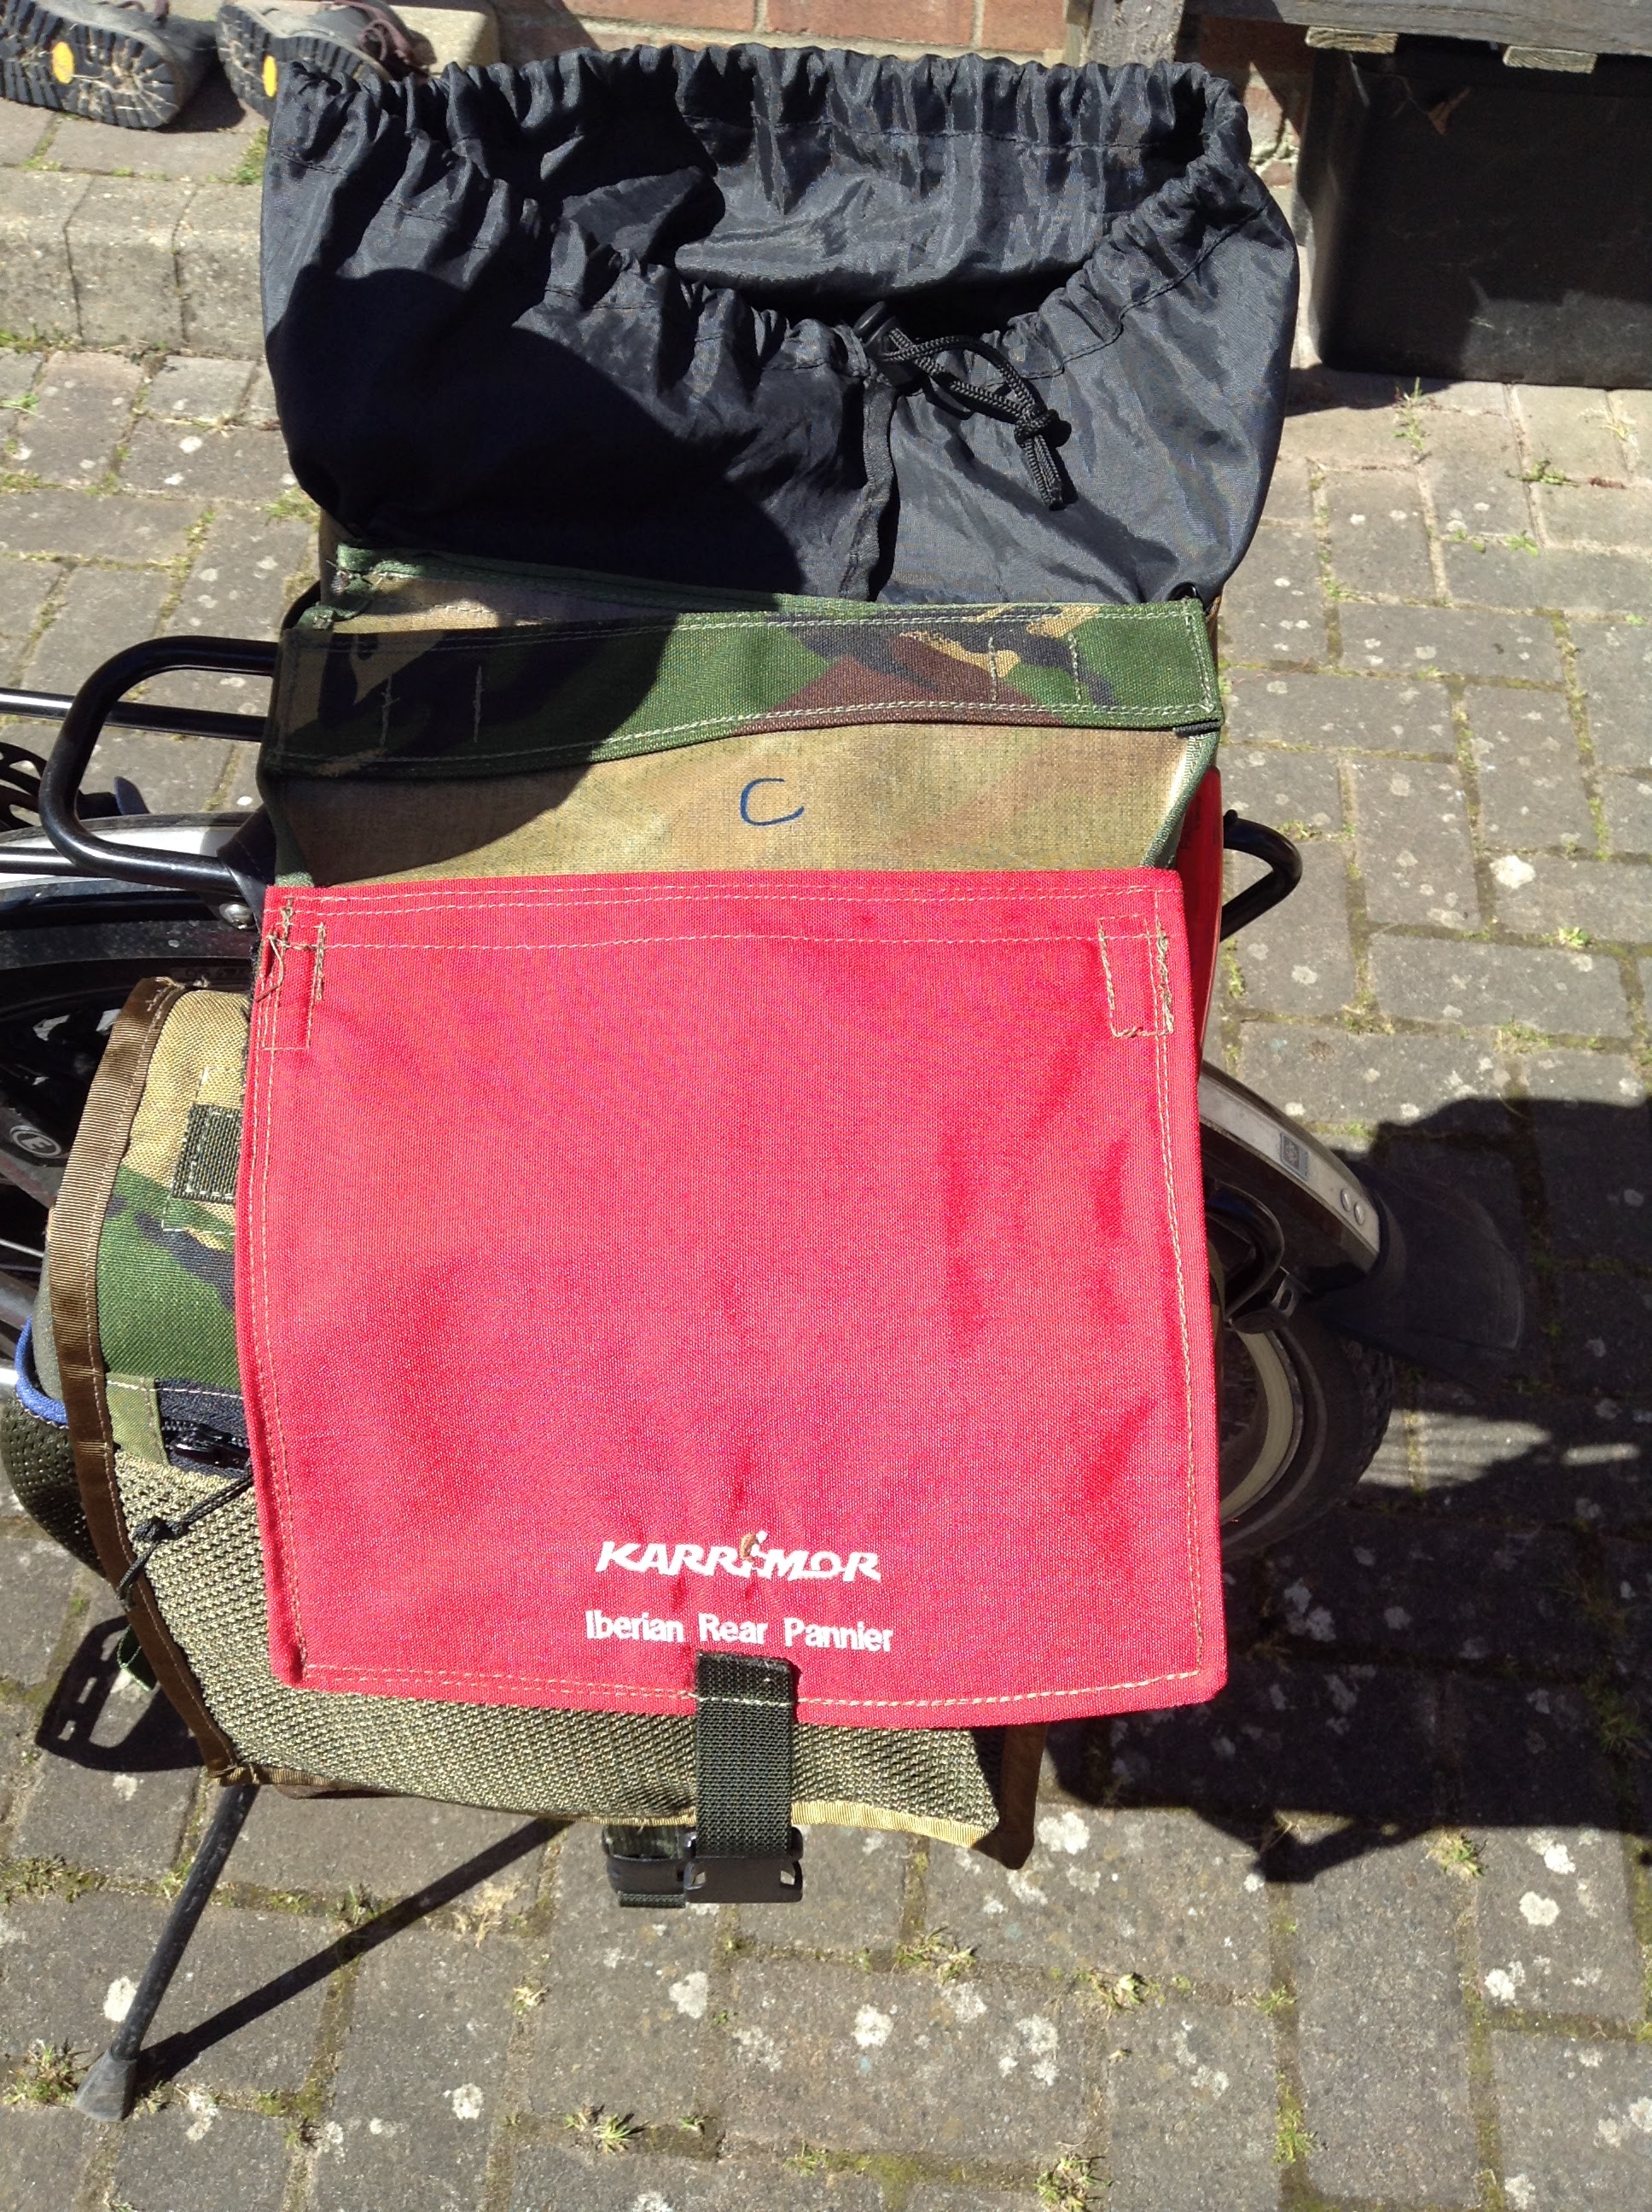
My fabric came mostly from a military surplus rucksack which I had bought some time ago, for about £15, completely taken apart (which took ages - the stitching was tough to unpick!) and washed. I saved everything - all the webbing and all the buckles. I didn't have quite enough fabric so had to use some new Cordura for the sides. I also used some red fabric which came from a pair of Karrimor panniers, which I had bought in a charity shop for £3, thinking they were too good a bargain to miss. However, as they turned out to be nothing like as good as the old faithful Karrimor ones I've got on my Trek, which I suspect are older, I cut them up too. The netting was new, from Contact Left.
 |
| Karrimor panniers - maybe 25 years old now |
Oh and I nearly forgot, some time ago I had acquired, for free, a bike transporting bag, which I also cut up. I used some of the black fabric from it for the linings, and some of the stiff foam (closed cell foam? I'm not quite sure....) for stiffening the backs.
So, I drew up a design, and cut out pattern pieces. I didn't want the panniers too big, so looked at the measurements for some of the smaller Ortlieb and Restrap ones online, and used those measurements as a basis. I definitely wanted some outside pockets. I wasn't sure at the beginning exactly how I'd attach the panniers to the bike, although I knew I wasn't going to go the whole hog and use proper pannier attachments. This was partly because I was trying to avoid spending any money on buying anything extra. As you can see, in the end I made straps from old inner tubes to attach them. The panniers are not identical due to not having enough of the same fabrics for each one. I also did the pockets differently, because I was learning as I went along!
I used my Bernina 930, with Gutermann Mara 70 thread, and my industrial Seiko Stw-8b with bonded nylon thread. I bought the latter machine about two years ago and this is the first project I have used it for. It proved invaluable. I compare this machine to a tractor when it starts up. It's a beast! Here it is -
Anyway, here are the panniers, on my Koga Traveller -
As you can see below, the two rear pockets are different. I did not do them "properly", with a proper lid, although I'd like to teach myself how to when I've got time. I just made it up as I went along. Both have Velcro fastening.
 |
Rear pockets
|
Flap with zipped net pocket, front pocket underneath, net pocket on side. The reason for the wire twist tags on the bottom strap is that I made them much too long! I'll shorten them when I get round to it.
By the way, sorry about the wheelie bins in the background. I usually have washing in the background, which is nicer really, although in our previous house, when we first moved there (estate cottage) we were told that the owners of the Big House (and owners of our house) did not want to see our washing on the line from their windows. I complied, using a rotary washing line out of their view, until baby number 4 came along and we just had too much washing. Then I stopped complying and strung my washing down the garden on a nice long line. That's the Upper Classes for you!! Back to the panniers.
 |
Strap with Velcro
|
When I made the second flap, I thought I might as well add a zip pocket to the inside. I should add that it was only after using them for the first time that I added the drawstring tops. They were just too open at the top of the sides without them. I couldn't really do it on the machine, at that stage, without a lot of hassle, so I stitched them on by hand, hence the big stitches.
 |
| Drawstring top and inside zip pocket |
The "C" is where I had labelled all the pieces so I wouldn't forget what each one was. The strip above the C is where I strengthened it before adding a webbing handle on the outside. I should really have got that red Karrimor bit visible on the outside somewhere, just for amusement!
Here is the back, with the strap, made from old inner tube, stitched down the edges
to make it lie flatter.
I could actually use the strap as a shoulder strap when the panniers are off the bike, although I don't aim to be taking them off the bike when in use as it takes ages to strap them back on again! However, thinking about when I'm staying overnight somewhere, and want to take my stuff into a B and B, I made 4 coloured bags out of oddments of lightweight fabric so that I can just remove these and their contents from the panniers. I made the orange one from a rucksack cover that I found on the Ridgeway. there's not a lot that I won't pick up and take home when I'm out and about!
This was the first time I used the panniers - rather nervously! - for shopping. Sausages on the rack! As you can see, when filled with shopping, the right hand one is hanging away from the bike a bit too much. However, the next time I used them, I arranged the straps differently, which kept them both closer to the bike.
The rather complicated arrangement of the straps round the rack!!
They are obviously not going to be waterproof, but I have waterproof covers that came with the Carradice ones so I will use those if necessary.
Although I say it myself, I'm pretty pleased with how they turned out. I didn't expect them to be this good! In fact I was chatting to an old neighbour the other day, who is a cyclist, and when he looked at my panniers I told him I'd made them, and he was extremely complimentary and said "You wouldn't have known it!"
You might now be wondering why I need 3 sets of panniers..... well obviously I don't really, but it was only after making these that I realized that I could hack the Carradice ones and improve them, so of course I had to.... I also enjoyed the process of designing and making these. It was good practice for me on the Seiko too, especially as I encountered some problems with it along the way but managed to fix them and keep going.